Appearance
Work Reports — Admin Guide
Work Reports gives your team a structured way to document what they did each shift. As an admin, you control whether the feature is on, what agents fill in, and how you review and follow up on submissions.
Who can do this?
All actions in this guide require the Admin or Owner role. Agents only see their own reports — they cannot access the admin management view.
Overview
When Work Reports is enabled:
- Agents submit a daily report after each shift using a form you define.
- Admins see every agent's submissions in a central dashboard, sortable and filterable by template, date range, and agent.
- The system detects missed reports and can notify agents automatically via Slack DM or email.
- A Leaderboard ranks agents by weighted performance score across all reported metrics.
- A Calendar View lets you see submission coverage day-by-day across your entire team.
Enabling Work Reports
Work Reports is disabled by default. You must enable it before agents can see or submit reports.
- In the left sidebar, go to Settings.
- Click Workspace Modules.
- Find the Work Reports toggle.
- Switch it ON.
- Click Save (if a save button appears) or wait for the auto-save confirmation.
📸 Screenshot: Workspace Modules settings page with Work Reports toggle highlighted in the ON position
Once enabled, Work Reports (labelled My Reports) will immediately appear in the sidebar for all agents in your workspace. Agents can start submitting reports straight away.
Disabling Work Reports
If you toggle Work Reports OFF, existing reports are preserved in the database but the sidebar link disappears for agents. They will not be able to create new reports while the feature is disabled. Re-enabling it restores access to all historical data.
Plan your rollout
Inform your team before enabling Work Reports. If agents don't know what they're supposed to submit or why, you'll get low-quality reports or none at all. A brief team message explaining the purpose and expectations goes a long way.
Report Templates
Report Templates define the structure of every agent's report. Instead of a fixed form, you can customise exactly what information agents provide when they submit a report.
What Is a Template?
A template has:
- A Name — an internal label to identify the template (e.g. Standard Daily Report, Weekend Shift Summary)
- Fields — the list of inputs agents see in their report form
Only the active template is used when agents submit new reports. You can have multiple templates saved but only one active at a time.
Default template
Before you create a custom template, agents will see the built-in default form with the standard fields (Date, Hours Worked, Tasks Completed, Blockers / Issues, Notes). Creating and activating a template replaces this with your custom structure.
Creating a Template
- Go to Work Reports in the sidebar.
- Click the Templates tab (or navigate to Settings → Work Report Templates).
- Click New Template.
- Enter a Template Name (e.g. Level 1 Support Daily Report).
- Add your fields:
- Click Add Field.
- Set the Field Label (e.g. Tickets Resolved, Escalations Made, System Issues).
- Choose the Field Type: Text (single line), Textarea (multi-line), Number, or Dropdown.
- Mark whether the field is Required or optional.
- Repeat for each field you want.
- Drag and drop fields to reorder them.
- Click Save Template.
📸 Screenshot: New Template form with several fields configured, drag handles visible
Setting the Active Template
- On the Templates list, find the template you want to use.
- Click Set as Active.
- A confirmation banner appears: "This template is now active. New reports will use this structure."
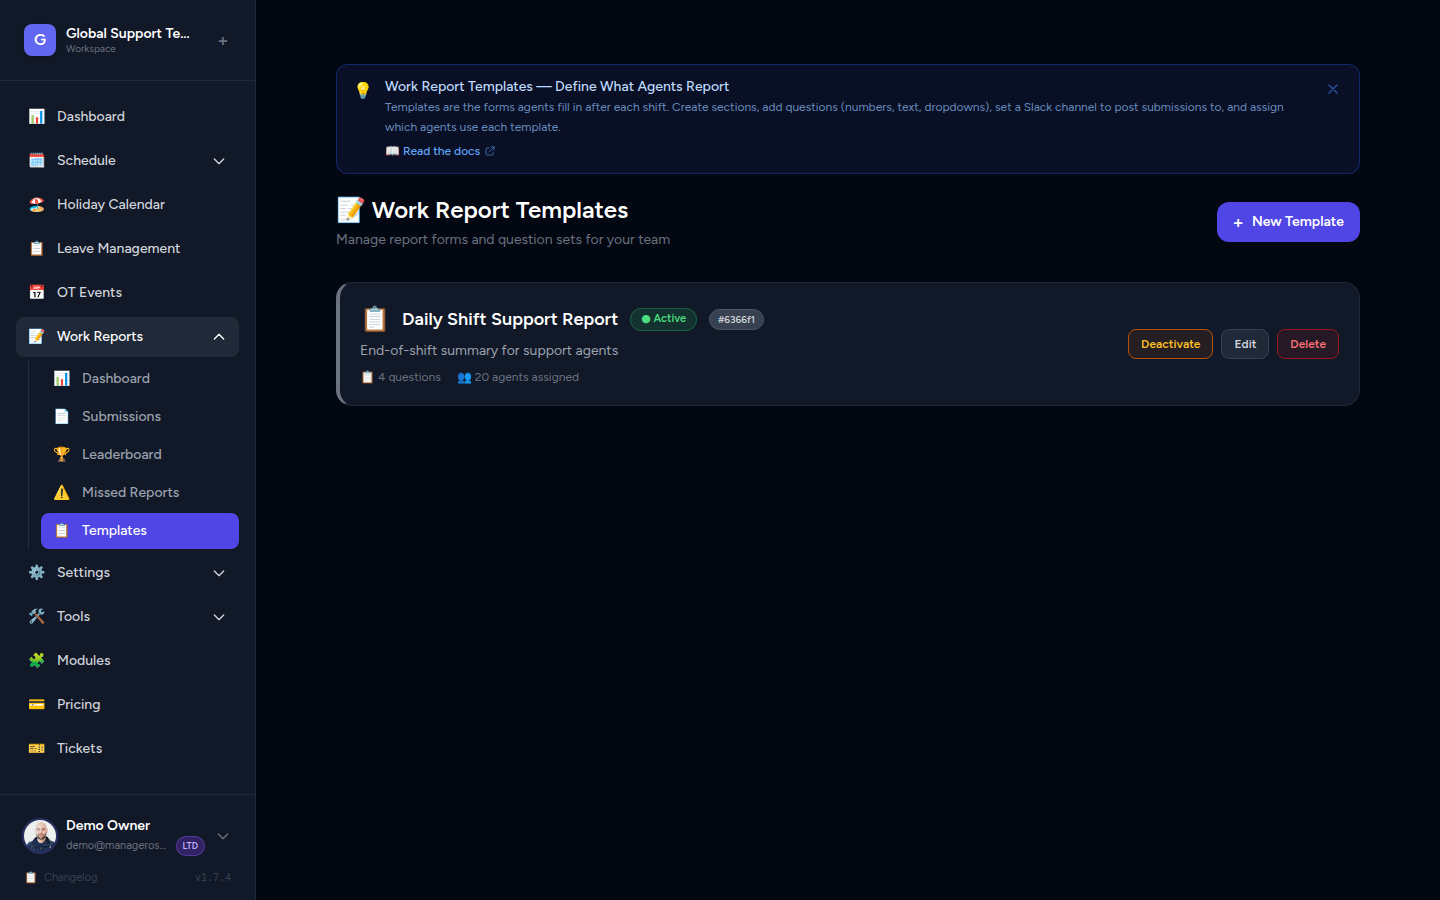
📸 Screenshot: Templates list with "Set as Active" button highlighted on one row and an "Active" badge on the current template
Changing the active template
Switching the active template only affects new reports created after the change. Existing submitted reports retain the structure they were created with. Agents currently editing a Draft report will see the new template fields the next time they open or refresh the form.
Editing a Template
- Open the Templates list.
- Click Edit next to the template you want to change.
- Add, remove, reorder, or rename fields.
- Click Save Template.
Avoid frequent template changes
If you change the active template often, your historical reports will have different structures, making bulk review harder. Try to finalise your template before rolling it out to agents.
Deleting a Template
- Open the Templates list.
- Click Delete next to the template you want to remove.
- Confirm the deletion.
You cannot delete the active template
To delete a template that is currently active, first set another template as active (or re-enable the default), then delete the one you no longer need.
Reviewing Agent Reports
The admin Work Reports Dashboard gives you a real-time picture of who has submitted a report and who hasn't — for a given template, date, and time window.
Accessing the Dashboard
- In the left sidebar, click Work Reports.
- The Dashboard loads automatically, defaulting to today in Day view with the first available template selected.
From the dashboard header you can also jump to:
- 🏆 Leaderboard — agent performance ranking
- 📅 Calendar — day-by-day submission heatmap
- 📋 All Submissions — full paginated list of every submission
📸 Screenshot: Work Reports Dashboard header showing the Leaderboard, Calendar, and All Submissions quick-links
Template Tabs
At the top of the filter bar, each active report template appears as a tab button. Click a template tab to load submission data for that template only.
- The currently selected template is highlighted in indigo.
- If no templates exist yet, a placeholder message is shown. Go to Settings → Report Templates to create one.
- The first template is auto-selected when you open the dashboard.
📸 Screenshot: Template tab row with three templates; the first is highlighted as active
Day / Week / Month Toggle
To the right of the template tabs, a Day / Week / Month toggle controls the reporting period:
| View | What it shows |
|---|---|
| Day | A single calendar day (default: today) |
| Week | Monday–Sunday of the selected week |
| Month | The full calendar month of the selected date |
Click any option to switch immediately. The agent panels and stats bar update to reflect the chosen period.
Date Navigation
Use the ← → arrow buttons to step backward or forward through days, weeks, or months (depending on the current toggle). The current range label (e.g. Today, Mar 2 or Mar 2 – Mar 8, 2026) is displayed between the arrows.
When you navigate away from the current period, a Today button appears. Click it to jump back to the current day/week/month instantly.
📸 Screenshot: Date navigation row showing left arrow, "Today, Mar 2" label, right arrow, and a "Today" jump button
Stats Bar
Below the filter controls, four stat cards summarise the current period at a glance:
| Card | What it shows |
|---|---|
| ✅ Submitted | Number of agents who have submitted at least one report |
| ⏳ Not Yet | Number of scheduled agents who have not yet submitted |
| 👥 Scheduled | Total agents scheduled to work in this period |
| Completion % | Submission rate with a colour-coded progress bar (green ≥ 100%, yellow ≥ 70%, orange ≥ 40%, red < 40%) |
📸 Screenshot: Four stat cards showing submitted=7, not yet=3, scheduled=10, completion=70% with a yellow bar
Submitted and Pending Panels
The main content area is split into two side-by-side panels:
✅ Submitted panel — lists every agent who has submitted a report for the selected period.
- Shows agent avatar, name, the work date and time the report was submitted.
- If an agent submitted multiple reports in a week/month view, a count badge appears (e.g. 3 reports).
- Click View → on any agent row to open that agent's full report.
- A 🎉 All done! banner appears when the submission rate hits 100%.
⏳ Not Submitted Yet panel — lists every scheduled agent who has not yet submitted.
- Shows agent avatar, name, and a label confirming they are scheduled for this period.
- Each row shows an Awaiting badge to distinguish pending agents at a glance.
- When all scheduled agents have submitted, this panel shows 🎉 Everyone submitted!
📸 Screenshot: Two-column layout with Submitted on the left (green header, 7 agents) and Not Submitted Yet on the right (amber header, 3 agents)
Off / Not Scheduled Strip
Below the two main panels, a compact strip shows agents who are not scheduled to work during the selected period (e.g. they have no working-day configuration or have a day off). These agents are not counted in the submission stats — they are shown purely for reference.
Agents appear as small avatar chips labelled with their name. The strip is only visible when at least one agent falls into this category.
📸 Screenshot: "Off / Not Scheduled Today" strip showing four agent chips at the bottom of the dashboard
If the dashboard shows "No one is scheduled"
This means no agents are assigned a working schedule that overlaps with the selected period. Check Agents → [Agent Name] → Edit and ensure their working days are configured correctly.
Work Report Leaderboard
The Leaderboard ranks every agent by a weighted performance score derived from the numbers they report in their work submissions each shift.
Accessing the Leaderboard
- Go to Work Reports in the sidebar (or the Dashboard).
- Click the 🏆 Leaderboard button in the top-right of the dashboard header.
Alternatively, navigate directly via the sidebar: Work Reports → Leaderboard.
📸 Screenshot: Dashboard header with the "🏆 Leaderboard" button highlighted
What the Leaderboard Shows
The leaderboard displays all agents assigned to at least one active report template, ranked by their total score for the selected period. Each row shows:
| Column | Description |
|---|---|
| # (rank) | Position, with 🥇🥈🥉 medals for the top 3 |
| Agent | Avatar, name, and a relative score bar |
| 🏆 Score | Weighted composite score |
| 🎫 Tickets | Total tickets handled (closed + replied) |
| 💬 Chats | Crisp chat replies + Magic Browser outreach |
| ⭐ Reviews | Reviews received and requested |
| 📋 Tasks | Cards, Userback tickets, Facebook replies |
| ✅ Rate | Report submission rate (submitted / expected days) |
| 🔥 | Current submission streak |
| This Week | Mini strip of daily submission statuses |
A Team Totals row at the bottom aggregates all agents' figures.
📸 Screenshot: Leaderboard table with top three rows highlighted in gold/silver/bronze tones, team totals at the bottom
Score Formula
Each agent's score is calculated from the numeric fields in their submitted reports, using these weights:
| Metric | Weight |
|---|---|
| Tickets closed | ×4 |
| Reviews received (platform + external) | ×5 each |
| Crisp customer ratings | ×3 |
| Review requests sent | ×2 |
| Tickets replied / followed up | ×1 |
| Chats replied | ×1 |
| Magic Browser outreach | ×1 |
| Cards created / followed up | ×1 each |
| Userback feedback replied | ×1 |
| Facebook posts replied | ×1 |
| Submission rate bonus | up to +10 (rate ÷ 10, rounded) |
A 100% submission rate adds the full +10 bonus to the score. An 80% rate adds +8, and so on.
📸 Screenshot: Score formula explainer bar at the bottom of the Leaderboard page
Range Selector
Use the This Week / This Month toggle (top-right of the page) to switch between:
- This Week — Monday of the current week through today
- This Month — the 1st of the current month through today
The leaderboard and all stats update immediately.
Sorting
By default the leaderboard sorts by Score (highest first). Click any column header or use the Sort by button row to re-rank by Tickets, Chats, Reviews, Tasks, or Rate.
Expanding an Agent's Breakdown
Click any agent row to expand a detailed breakdown panel below it. The breakdown shows every individual metric (tickets closed, tickets replied, chats replied, Magic Browser, reviews received, review requests, Crisp ratings, cards created/followed up, Userback, Facebook, tickets followed up) as individual stat cards.
Click the row again to collapse the breakdown.
📸 Screenshot: Expanded breakdown panel showing 12 individual metric cards for a single agent
Submissions Calendar View
The Calendar View gives you a visual, day-by-day picture of every agent's submission history across a week or month — ideal for spotting patterns, persistent missed days, or agents who are consistently on time.
Accessing the Calendar View
- From the Work Reports Dashboard, click the 📅 Calendar button in the header.
- Alternatively, click 📅 Calendar from the Leaderboard page header.
The calendar opens in Week view by default, showing the current week.
📸 Screenshot: Calendar View header with "📅 Submission Calendar" title and "Week / Month" toggle
Week View
In week view, the calendar displays a grid of agents × days (Monday through Sunday):
- Each row is one agent.
- Each column is one day of the week.
- Each cell is colour-coded by submission status.
Cell colour key:
| Colour | Status | What it means |
|---|---|---|
| 🟢 Green | ✅ Submitted | Agent submitted a report for this day |
| 🔴 Red | ⚠️ Missed | Agent was scheduled but did not submit |
| 🔵 Blue | 🔵 Upcoming | Future scheduled day — report not due yet |
| ⬜ Grey | — Not scheduled | Agent had no shift on this day |
Click any green cell to jump directly to that agent's submitted report.
📸 Screenshot: Week view grid with five agents and seven day columns; green, red, blue, and grey cells visible
Month View
Switch to Month view to see a calendar-style grid for the entire month. Each day cell summarises the team's submission activity for that date:
- The cell background colour reflects the overall status:
- Green — all scheduled agents submitted
- Red — at least one agent missed
- Blue — day is upcoming (future)
- Grey — no reports were due
- A small submitted/total count (e.g. 7/10) appears in the top-right corner of each day.
- A progress bar shows the submission ratio at a glance.
- Emoji counters (✅ submitted, ⚠️ missed, 🔵 upcoming) appear inside each cell.
Click any day cell to drill into the week detail view for that day.
A per-agent summary table below the grid lists each agent's scheduled days, submitted count, missed count, and submission rate for the full month.
📸 Screenshot: Month view showing a full March calendar with colour-coded day cells and summary counts
Navigation
Use the ← → arrows to move between weeks or months. A Today button appears when you navigate away from the current period.
Agent Filter
Use the All Members dropdown to focus on a single agent. The grid (week or month) updates to show only that agent's data.
Spotting Patterns
The Calendar View is most useful for:
- Identifying consistent late submitters — a column of red cells on the same weekday each week suggests a scheduling or reminder gap.
- Verifying an agent's claims — if an agent disputes a missed-report flag, you can quickly scan their calendar row.
- Checking onboarding — new agents should turn green within their first scheduled week; a run of grey cells means their working-days config may not be set up.
📸 Screenshot: Week view with one agent's row showing four consecutive red cells — a clear pattern of missed Monday–Thursday reports
Missed Report Detection
Manage Roster automatically tracks which agents have not submitted a report for days they were scheduled to work.
How It Works
- At the end of each working day, the system checks every active agent's working-days configuration.
- If an agent has no submitted (or draft) report for a past working day, that date is flagged as Missing for that agent.
- Missing entries are visible in the Calendar View as red cells and in the All Submissions list when filtered by Status = Missing.
- Agents can receive an automatic notification (Slack DM or email) when they miss a report — see Slack DM Missed Report Alerts below.
Missing = no submitted report
A report in Draft status is not counted as submitted. If an agent has only saved a Draft, the system may still flag the date as missing until the agent clicks Submit.
Viewing Missing Reports
- Go to Work Reports → All Submissions in the sidebar.
- In the filter bar, set Status to Missing.
- The table will show every agent × date combination where no submitted report exists for a past working day.
- You can further narrow by Agent or Date Range to focus on specific people or periods.
Missed-Report Notifications
How Notifications Are Triggered
When an agent misses a work report, the system dispatches a delayed notification job. Notifications fire 3 hours after the agent's scheduled shift end time. This delay gives agents time to submit before receiving a reminder.
The command that dispatches these jobs is:
bash
php artisan reports:notify-missedRun it daily (typically at the start of your day) via cron or the Laravel Scheduler. The system calculates each agent's shift end time and delays the notification job accordingly — so running the command once per day is sufficient.
Notification Channels
Admins can configure which channel(s) agents receive missed-report alerts through. The options are:
| Setting | What happens |
|---|---|
| Slack DM (default) | Agent receives a direct message in Slack |
| Agent receives a reminder email | |
| Both | Agent receives both a Slack DM and an email |
See Slack DM Missed Report Alerts below to configure Slack DMs. Email delivery requires only a valid email address on the agent's profile.
Scheduling Automatic Notifications
Option A — Laravel Task Scheduler (recommended)
In app/Console/Kernel.php, add the command to the schedule method:
php
$schedule->command('reports:notify-missed')
         ->dailyAt('09:00')
         ->timezone('Asia/Dhaka'); // adjust to your workspace timezone
Then make sure your server has a single cron entry running Laravel's scheduler:
bash
* * * * * cd /var/www/roster-portal && php artisan schedule:run >> /dev/null 2>&1Option B — Direct cron entry
If you prefer a direct cron entry (without the Laravel scheduler):
bash
0 9 * * * www-data cd /var/www/roster-portal && php artisan reports:notify-missed >> /dev/null 2>&1Adjust the time and timezone to match your team's working hours.
Test before scheduling
Run php artisan reports:notify-missed manually first to confirm notifications are going out correctly before setting up a recurring schedule. Check the log file at storage/logs/laravel.log for any errors.
Slack DM Missed Report Alerts
In addition to email reminders, Manage Roster can send agents a direct message in Slack when they miss a work report. The DM includes a Submit Now button that takes the agent straight to the report form.
Configuring Alert Notifications
- In the left sidebar, go to Tools → Integrations.
- Open the Slack integration card.
- Find the Alert Notifications card.
- Set the Missed Report Alert Channel to one of:
- Slack DM — sends a direct message to the agent in Slack (default)
- Email — sends a reminder email only
- Both — sends both a Slack DM and an email
- Save the setting.
📸 Screenshot: Slack integration page with the Alert Notifications card expanded, showing the Slack DM / Email / Both selector
How Slack DMs Work
When a missed report is detected and the alert channel includes Slack:
- The system opens a direct message channel with the agent in your connected Slack workspace.
- A short Block Kit message is posted, listing the missed date and report template.
- A Submit Now button in the message links directly to the report submission form.
- The DM is sent approximately 3 hours after the agent's scheduled shift end time.
📸 Screenshot: Example Slack DM showing "You missed your Work Report for March 1" with a "Submit Now" button
3-hour delay by design
The delay gives agents time to submit their report after their shift ends before the reminder fires. If they submit within 3 hours of shift end, no DM is sent.
Requirements for Slack DMs
Both of the following must be in place before a Slack DM can be delivered:
| Requirement | Where to configure |
|---|---|
| Agent has a Slack Member ID set | Agents → [Agent Name] → Edit → Slack Member ID |
Workspace Slack integration is active and has the im:write scope | Tools → Integrations → Slack → Connect |
If either requirement is missing, the Slack DM is skipped and a log entry is written to storage/logs/laravel.log. The email fallback fires only if Both is selected as the alert channel.
Finding a Slack Member ID
In Slack, click an agent's profile photo → View full profile → the three-dot menu (⋯) → Copy member ID. Paste this value into the agent's Slack Member ID field in Manage Roster.
Slack bot scope
The im:write scope allows the Manage Roster bot to open direct message channels. If your Slack app does not have this scope, re-authorize the integration from Tools → Integrations → Slack → Reconnect and accept the updated permission request.
Bulk View — Agent × Day Heatmap
The Bulk View gives you a bird's-eye picture of your entire team's submission activity for the current month. It displays a matrix (heatmap) where:
- Each row is an agent
- Each column is a day of the current month
- Each cell is colour-coded by submission status
Colour Key
| Colour | Meaning |
|---|---|
| 🟢 Green | Submitted or Reviewed |
| 🔴 Red | Missing (agent had a working day with no report) |
| 🔵 Blue | Draft (started but not submitted) |
| ⬜ Grey / Empty | Agent was not scheduled to work that day |
📸 Screenshot: Bulk View heatmap for a team of 8 agents across the current month, with colour-coded cells
Accessing the Bulk View
- Go to Work Reports in the sidebar.
- Click the Bulk View tab (or the Monthly Overview button in the top navigation area of the Work Reports section).
- The heatmap loads for the current month automatically.
📸 Screenshot: Work Reports section header with "All Reports", "Bulk View", and "Templates" tabs visible
Using the Bulk View
- Hover over a cell to see a tooltip with the agent's name, date, and report status.
- Click a green cell to jump directly to that agent's submitted report for review.
- Click a red cell to see the agent's profile and options for sending a reminder.
- Use the month navigation arrows to move to the previous month (current month is the default and most recent).
📸 Screenshot: Tooltip appearing on a heatmap cell showing "Jordan Lee — 2026-02-14 — Submitted"
Spot patterns at a glance
The heatmap makes it immediately obvious which agents are consistently submitting and which are falling behind. Red clusters around specific agents or days are a clear signal to follow up.
Bulk View shows the current month only
Historical months can be viewed using the month navigation arrows, but the heatmap generates data based on agents' scheduled working days for that period. Agents added or deactivated during the month will appear with data only for the days they were active.
Managing Agent Working Days
Missed report detection and notifications rely on each agent's working-days configuration being accurate. If an agent's working days are set incorrectly, they may receive reminders for days they don't actually work — or miss reminders on days they do.
To review or update an agent's working days:
- Go to Agents in the sidebar.
- Click the agent you want to update.
- Click Edit.
- Update the Working Days and Days Off fields.
- Click Save.
📸 Screenshot: Agent edit form with Working Days checkboxes highlighted
Keep working days accurate
When an agent changes shifts or their schedule changes permanently, update their working-days configuration right away. This ensures missed-report detection stays accurate and avoids false reminders.
Frequently Asked Questions
An agent says they submitted their report but it still shows as Missing. What's wrong?
The Missing status only clears when a report is in Submitted (or Reviewed) status. A Draft is not counted as submitted. Ask the agent to open their Draft and click Submit.
Can agents see each other's reports?
No. Agents can only see their own reports. Admins see all reports from all agents.
Can I export Work Reports to CSV or PDF?
Exporting is not currently available in the UI. Check with your development team about custom exports, or query the database directly if you need bulk data exports.
How do I stop an agent from receiving missed-report notifications?
Missed-report notifications are tied to an agent's working-days configuration. If an agent should not be receiving reminders (e.g. they're on extended leave), you can:
- Temporarily clear their Working Days so no days are flagged as missed.
- Or disable their agent profile if they are inactive.
Can agents edit a submitted report if they made a mistake?
No. Submitted reports are locked. Only an admin can add a Review Note to clarify or correct information contextually. There is no way to unlock a submitted report for agent editing.
What happens to reports when I disable the Work Reports module?
Existing reports are preserved in the database. They are hidden from agents while the module is off. Re-enabling the module restores full access to all historical data.
Can I delete a report?
Report deletion is restricted to Owners and is not available through the standard UI. Contact your platform administrator or development team if you need to remove a specific report.
The reports:notify-missed command isn't sending Slack DMs. What should I check?
- Confirm the Slack integration is connected with the
im:writescope under Tools → Integrations → Slack. - Verify each agent has a valid Slack Member ID set in their profile.
- Check
storage/logs/laravel.logfor skip messages (e.g. "no active Slack integration" or "agent has no slack_member_id"). - Confirm the Alert Notifications channel is set to Slack DM or Both (not Email only).
The reports:notify-missed command isn't sending emails. What should I check?
- Confirm your application's mail configuration is correct in
.env(MAIL_HOST,MAIL_USERNAME, etc.). - Check
storage/logs/laravel.logfor error messages from the last run. - Verify that agents have valid email addresses in their profiles.
- Confirm the Alert Notifications channel is set to Email or Both (not Slack DM only).
- Run
php artisan config:cacheto ensure environment changes are applied.
The leaderboard shows zero scores even though agents have submitted reports. Why?
Scores are calculated from numeric fields in report submissions whose field_key matches the weighted metrics (e.g. tickets_closed, xcloud_reviews_received). If your report template uses different field keys, those values won't be picked up. Work with your developer to align template field keys with the scoring system.
Summary: Admin Checklist
Use this checklist when setting up Work Reports for your workspace:
- [ ] Enable Work Reports in Settings → Workspace Modules
- [ ] Inform your team about the feature and what you expect from submissions
- [ ] Create a Report Template that matches your team's reporting needs (or use the default)
- [ ] Set your custom template as Active
- [ ] Verify each agent's Working Days configuration is accurate
- [ ] Connect the Slack integration (if using Slack DM alerts) under Tools → Integrations → Slack
- [ ] Set each agent's Slack Member ID in their profile (required for Slack DM reminders)
- [ ] Configure the Alert Notifications channel under Tools → Integrations → Slack
- [ ] Test the
reports:notify-missedcommand manually to confirm notification delivery - [ ] Schedule the command in cron or Laravel Scheduler for daily automation
- [ ] Review the Dashboard at the end of the first day/week to check adoption
- [ ] Check the Leaderboard weekly to recognise top performers
- [ ] Use the Calendar View monthly to spot any persistent missed-report patterns
Related
- Work Reports — Agent Guide — What agents see and how they submit reports
- Workspace Setup — Enabling and configuring workspace modules
- Agents — Managing agents and their working-day configurations
- Invite Members — Giving team members access to the workspace